
Independent guide · Updated 2026-10-20
Harnesses and leads
Fit, materials and handling features for comfortable restraint without relying on pain or neck pressure.
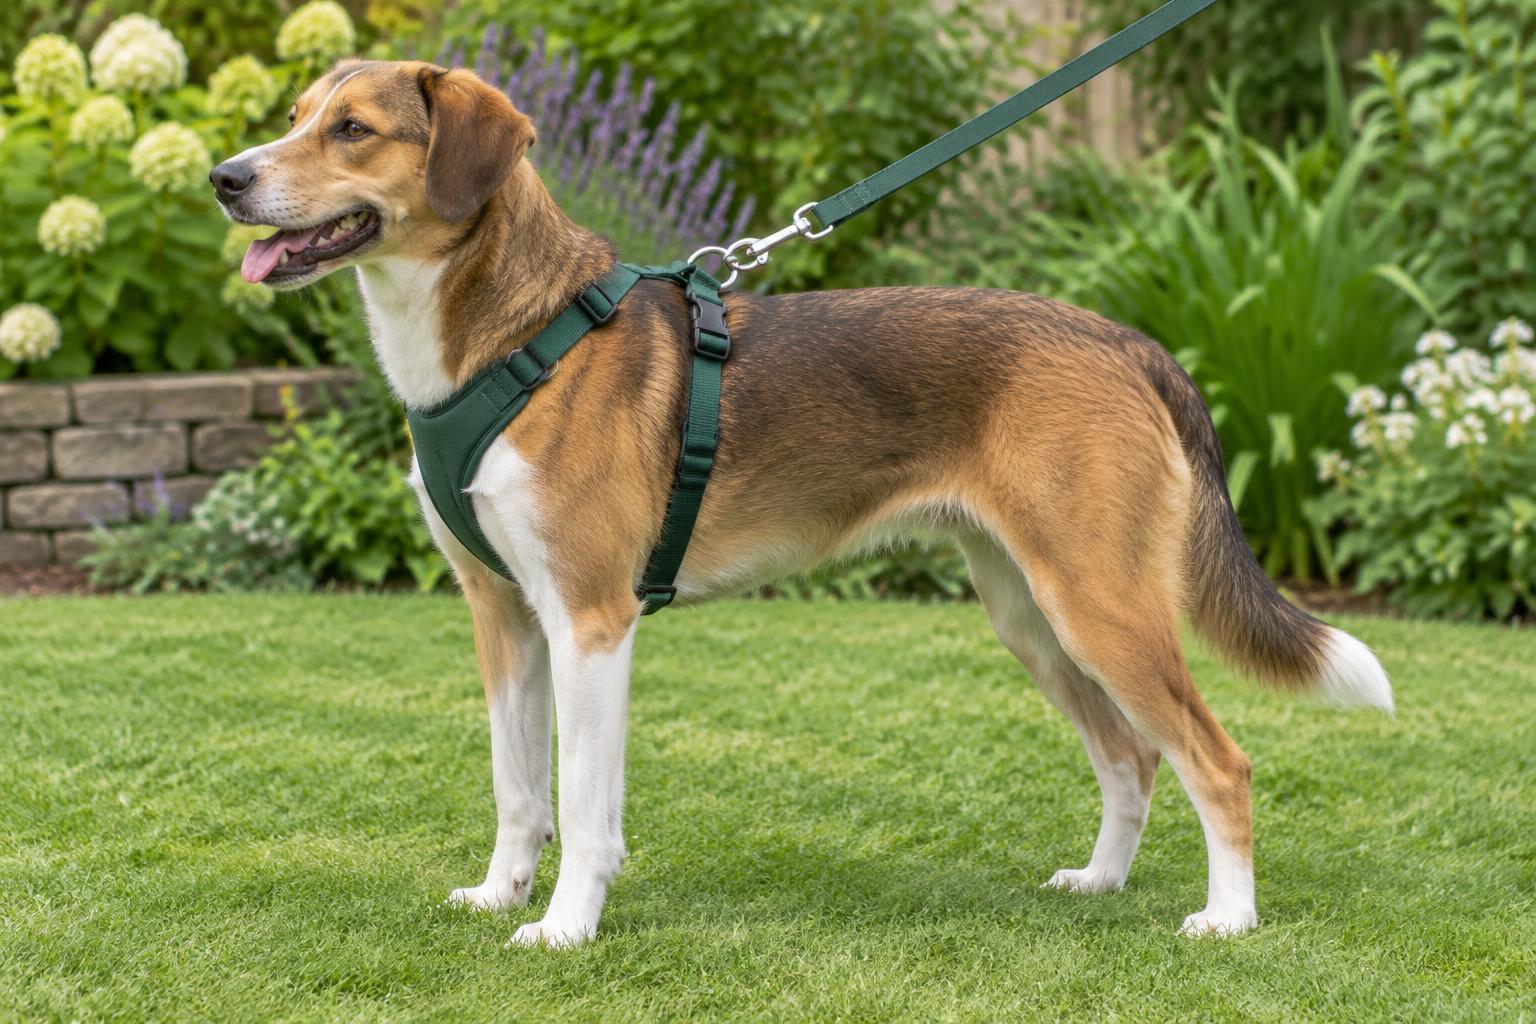
AI-generated editorial illustration; not a clinical demonstration or documentary photograph.
What to look for
- Shape
- A Y-shaped front generally allows shoulder movement and avoids crossing the throat.
- Adjustment
- Multiple adjustment points help prevent rubbing and escape gaps.
- Hardware
- Clips, stitching and attachment rings should suit the animal’s strength and activity.
Sizing and fit
Measure neck base and deepest chest while the animal stands. Follow the maker’s actual measurement chart, not breed labels.
Safety checks
- Check that two fingers fit without loose escape gaps.
- Inspect stitching and clips before every walk.
- Do not leave a harness on an unattended animal.
Cleaning and maintenance
Wash according to the label, rinse salt or mud promptly and replace frayed webbing or distorted hardware.
A harness fitting decision
| Observation | Next step |
|---|---|
| Throat or elbow pressure | Adjust or try a different shape; do not accept rubbing as normal. |
| Backing out | Reassess security in an enclosed space; seek individual fitting advice. |
| Freezing during fitting | Pause and break handling into easier rewarded stages. |
| Damaged clip or stitching | Replace before the next walk. |
| Car journey | Use appropriate travel restraint, not an assumed walking-harness rating. |
No design guarantees escape prevention or crash protection. Comfort and security require an individual check.
Compare fit on the animal, not the packaging
Record the manufacturer's requested measurements while the animal stands comfortably, then check the actual size chart. Breed names and body weight do not describe chest shape, coat thickness or a growing puppy's proportions. A Y-shaped design can be a useful starting point, but the individual fitting matters more than the label. Watch the animal walk, turn, sit and lower its head. Straps should not press on the throat, dig behind the elbows or visibly restrict movement. A harness that fits a standing animal may still rub during a walk.
- Check adjustment range before removing tags.
- Inspect contact points after a short trial walk.
- Recheck growing animals and after weight or coat changes.
Introduce handling without forcing participation
Let the animal investigate the equipment before it is put on. Practise approaching an opening, brief strap contact and the sound of clips separately, using rewards the animal values. Work in a quiet secure space and pause if the animal freezes, retreats or struggles. Do not chase it around with the harness. For cats, indoor acceptance must come before outdoor practice; not every cat enjoys walks. A suddenly reluctant animal may have pain or an unpleasant previous experience, so reassess handling and seek veterinary advice when appropriate.
Plan for escape and handling failures
Test security gently in an enclosed place, without deliberately frightening the animal or pulling it backwards. Some body shapes and fearful animals can reverse out of apparently snug designs. Discuss appropriate escape-resistant equipment and a backup connection with a qualified reward-based professional, rather than making straps painfully tight. Inspect stitching, attachment rings and clips before leaving home. A lead attachment is only as reliable as the weakest fitting. Choose a lead that can be held comfortably without winding it around fingers; sudden pulling can injure both the handler and the animal.
Choose restraint for the setting
Walking equipment is not automatically tested for vehicle restraint, tethering or lifting. Use an appropriate carrier or vehicle system according to its instructions and do not infer crash protection from a strong-looking buckle. Long lines need open safe space, supervision and a plan to avoid entangling people or other animals. Retractable leads offer limited control near traffic and crowds. Keep unfamiliar dogs at a comfortable distance rather than relying on tighter restraint to manage distress. Equipment cannot replace training, a secure environment or assessment of fear and pain.
Clean, retire and review
Follow the care label and dry equipment thoroughly before storing it. Salt, mud and grit can damage fittings or irritate skin. Retire webbing with torn stitching, cracked clips or distorted rings; a cosmetic repair is not enough when a restraint connection can fail. Avoid leaving a walking harness on during unattended rest because straps can snag and prolonged contact may rub. Record where irritation occurs so a replacement addresses the actual problem. If comfortable movement cannot be achieved, take the equipment and measurements to an experienced professional for individual advice.
Common questions
- Does a Y-shaped harness fit every dog?
- No. Check actual strap positions and movement; shape alone does not guarantee comfort or security.
- Can my cat wear a walking harness all day?
- Avoid unattended wear and snagging risks. Introduce it gradually and use it only when appropriate and supervised.
- Is a walking harness also a car restraint?
- Not necessarily. Follow the travel system's stated purpose and fitting instructions; do not assume crash testing.
- Will buying a harness stop pulling?
- No. Comfortable equipment supports handling, but loose-lead walking and fear-related behaviour need appropriate training and sometimes professional assessment.
Sources for this guide
AI-assisted educational guidance, updated 2026-10-20. Not professionally reviewed; sources do not imply endorsement.
A practical purchase and first-use check
- Match harnesses and leads to the listed species (Dogs, Cats), the individual animal and the actual task. A product's marketing claim is not proof it meets those needs.
- Before ordering, verify fit: Measure neck base and deepest chest while the animal stands. Follow the maker’s actual measurement chart, not breed labels. Check the return policy if safe fitting cannot be established from measurements.
- Introduce new gear under supervision. Watch movement, skin contact and willingness to wear it; stop if it causes rubbing, distress or trapping.
- Plan the ongoing upkeep: Wash according to the label, rinse salt or mud promptly and replace frayed webbing or distorted hardware. Include replacement parts and safe disposal, not only the initial price.
Educational reference, not an individual diagnosis or a verified professional review. Read our editorial policy.
Guidance libraries and further reading
These organisations publish relevant guidance. Their links are further reading, not evidence that they have reviewed this page.
- PDSA — veterinary charity pet health advice
- RSPCA — animal care and welfare advice across species
- International Cat Care — cat health, behaviour and welfare advice